If you’re just starting out with creating classroom escape rooms for your students, you may want to check out my post on How to Create an Escape Room for the Classroom, where I share my top tips on choosing a theme, ideas for puzzles and question type options. Once you’re ready to create your first digital escape room on Google Forms, read on for my ideas on how to create a fun and engaging virtual escape room. If you’re new to Google Classroom, you can read my step-by-step guide here on how to set up Google Classrooms.
Begin by opening your Google Drive and choose ‘New’ and select ‘Google Form’.
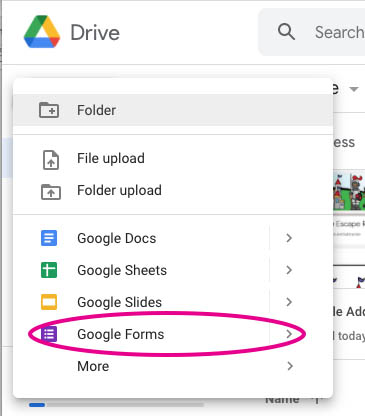
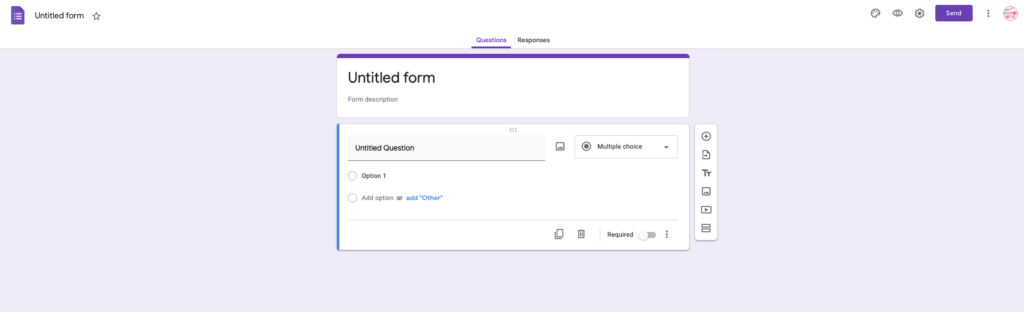
This will open a new Google Forms document.
You may want to change the appearance of the form to suit your theme. You can do this by clicking the ‘Customize Theme’ button in the top right corner. Here you can change the theme color and add an image to the top of your form. You can also change the background color and font style.
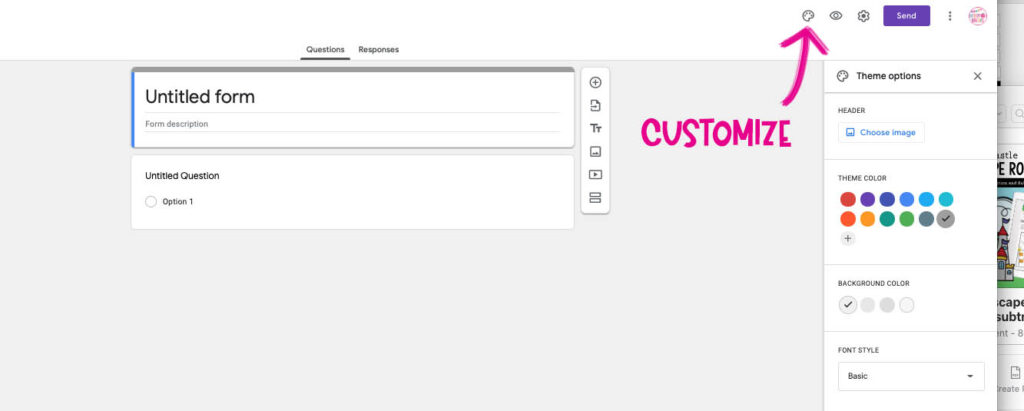
Select ‘Header > Choose image’ from the theme options drop down menu to select a Google Form header image.
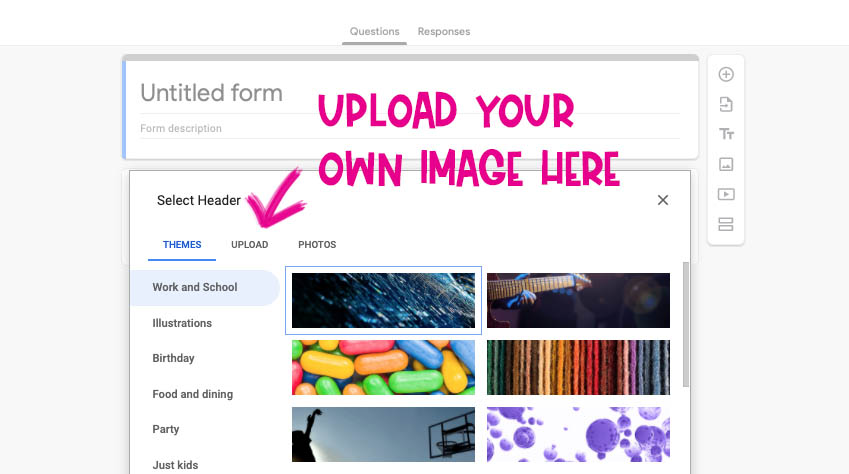
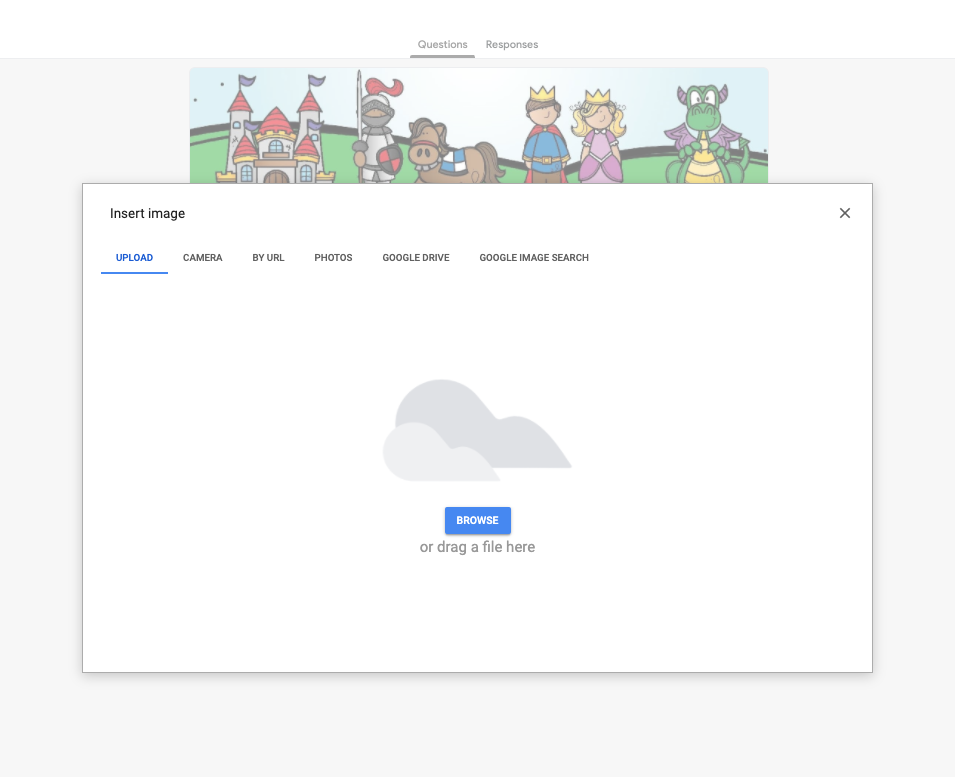
There are lots of images you can choose from to create your escape room on Google Forms and you can also add your own image. For this escape room, I am building a medieval castle themed escape room, and I have created my own heading image, which you can add by clicking on the ‘Upload’ button.
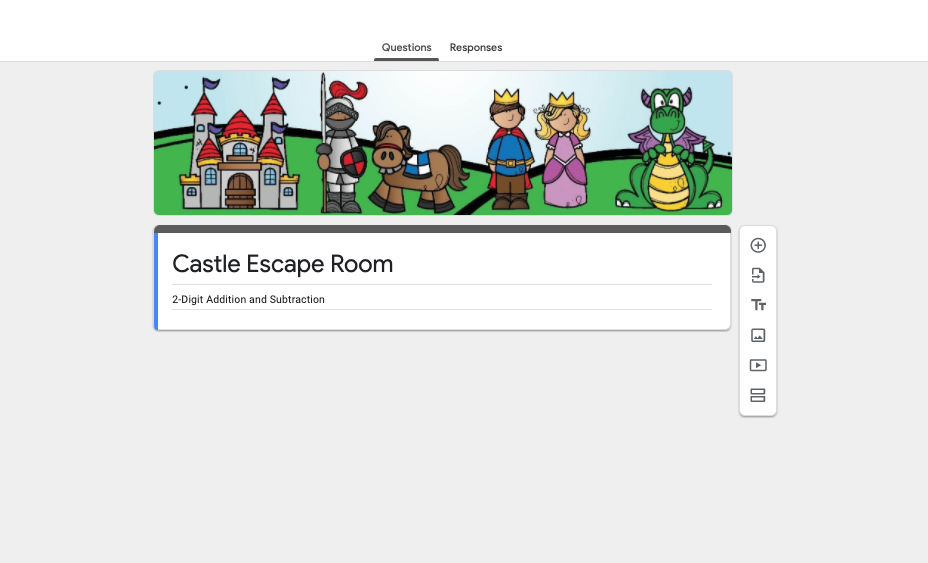
I have deleted the first question block as I don’t actually want that first on my escape room, so I have just left the title and description for now, where I have added ‘Castle Escape Room’ and ‘2-Digit Addition and Subtraction’ in the description.
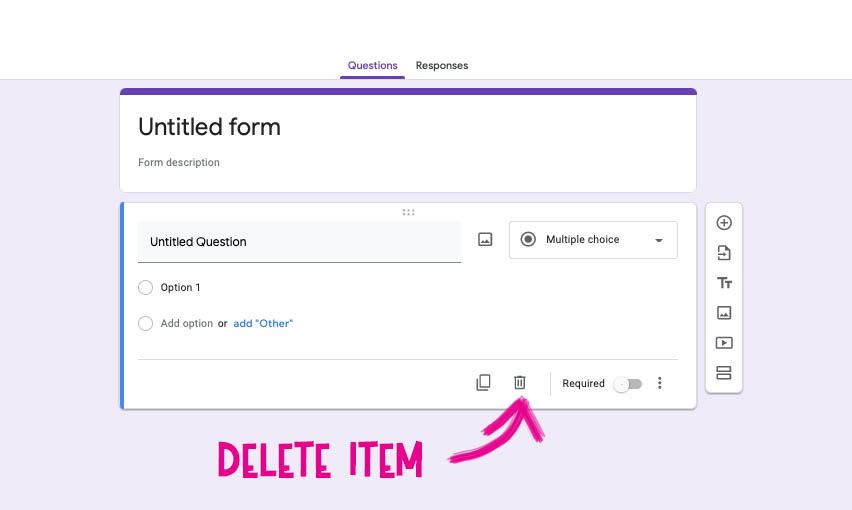
To delete any item, simply click on the ‘delete’ icon at the bottom of a section.
You build the form in ‘sections’. Each section will appear as a single page to your students. For my first section, I want to set the scene and introduce the overall task they have to complete. This will be to collect a series of keys in order to escape a castle. I have created most of the different sections as images, of which I have taken screenshots to insert into the Google Form. You can do this in a programme such as PowerPoint, like you would for a worksheet or task card and insert them into the Google Form as you build it.
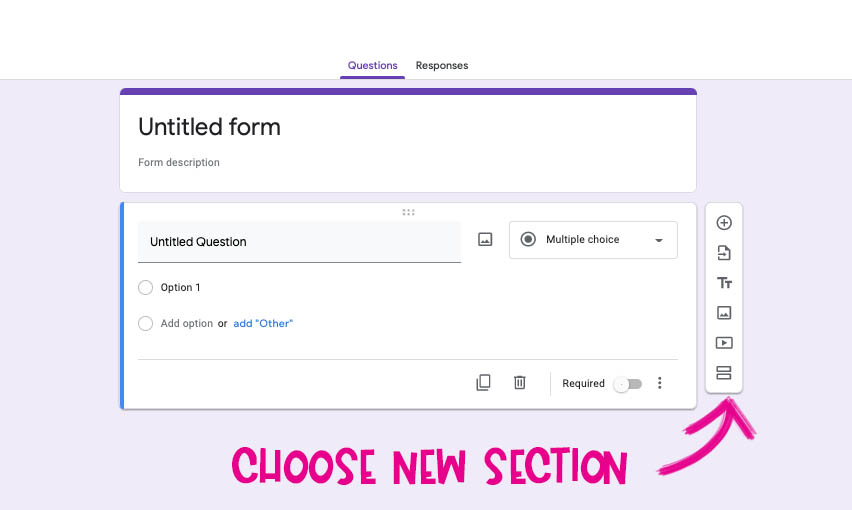
These icons are where you can choose the type of item you want to add next with the section you are working on. The options are:
I want to add an image I have already created and taken a screenshot of, so I will choose ‘Add image’. You can then upload and insert your image file.
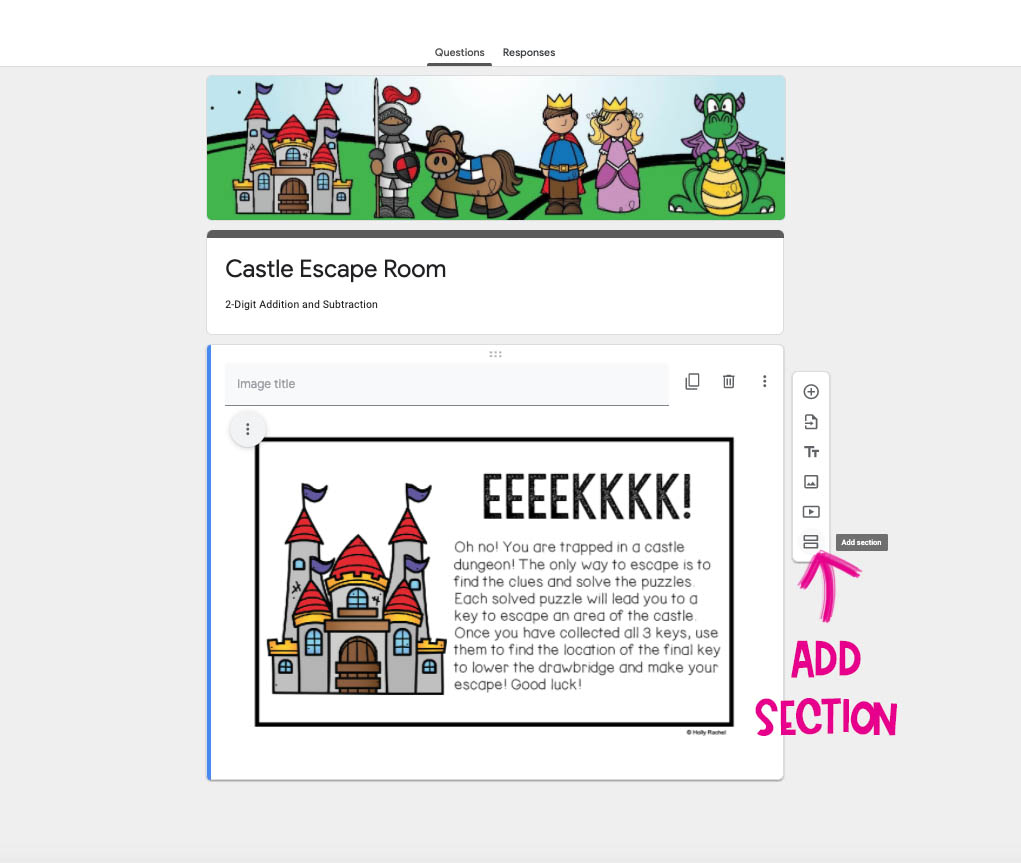
I now have my scene setting introduction, inserted as an image. There is no question in this section, I simply want students to click to the section after they have read the text. Click ‘Add section’ which will begin a new section on a new page for students with the first question.
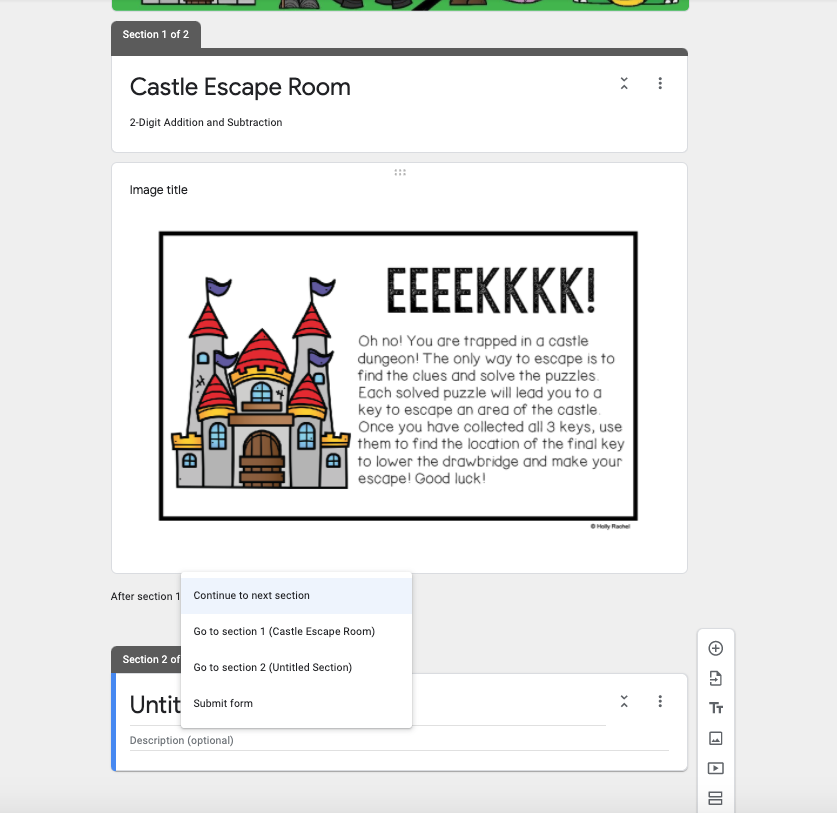
To do this, make sure ‘Continue to next section’ is selected in the drop down ‘After section 1’ underneath the image.
In this new section, I am ready to add in my first question for my escape room on Google Forms.
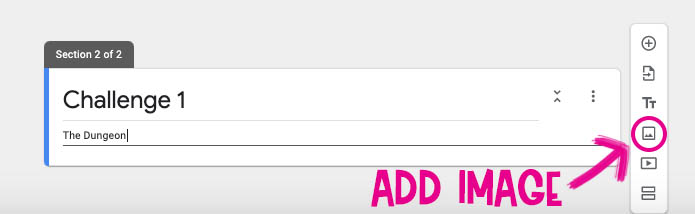
Here I have added ‘Challenge 1’ for the title and ‘The Dungeon’ for the description to introduce the first room in the castle. Next, I want to add in my screen shot with my first question, so I will choose ‘Add image’.
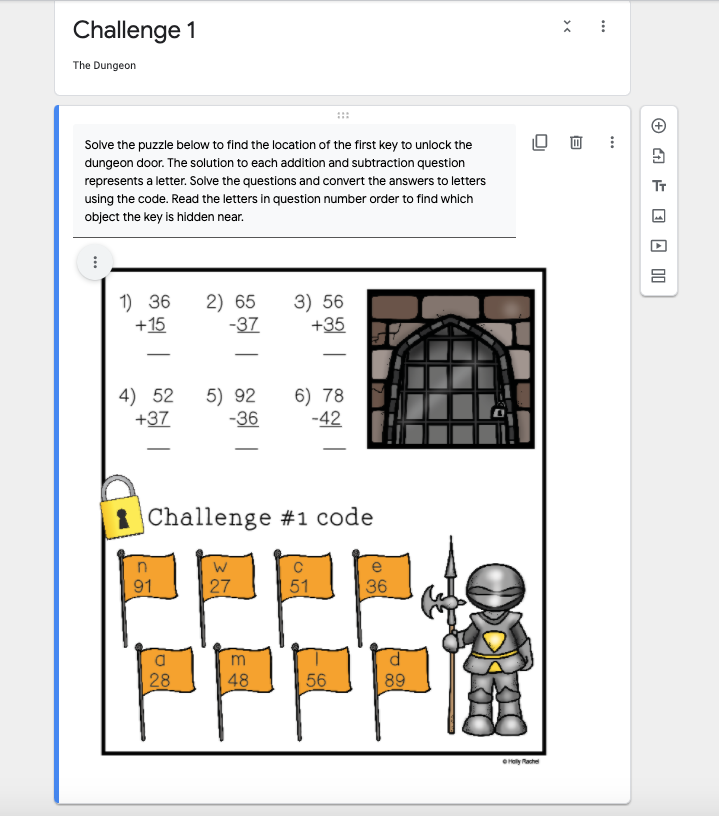
There is also a section above the image to add a description. I have typed in an introduction and instructions for the first question.
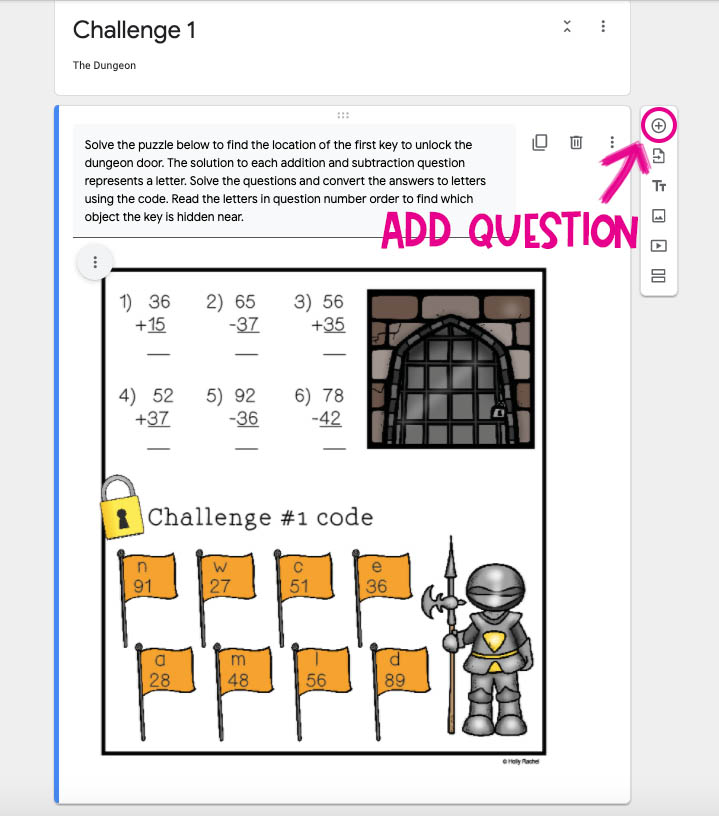
Now I am ready to add the question where students enter their answer. To do this, choose ‘add question’.
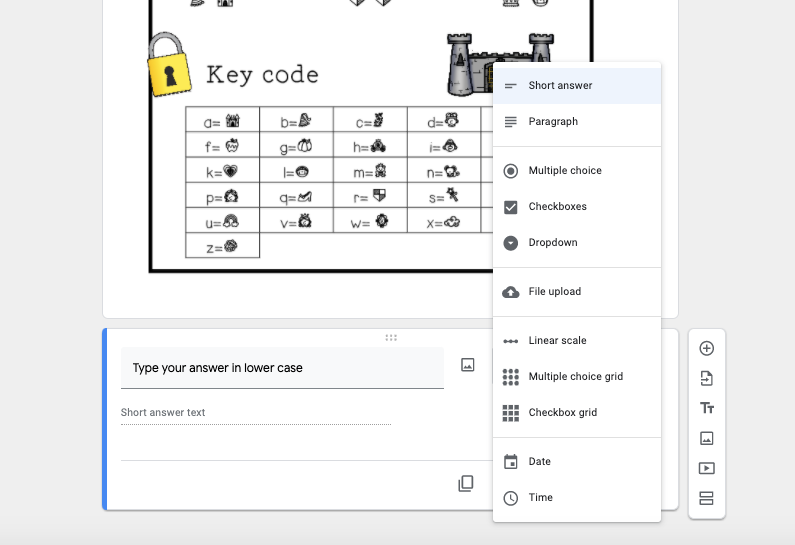
 Now, the question options will appear:
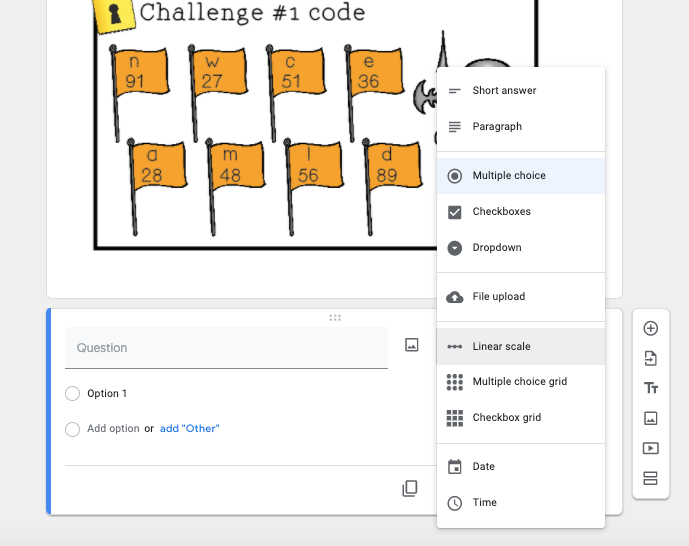 .
.
You can choose from many types of different question types such as short answer, multiple choice, checkbox etc. For this answer, I want students to type in the word they have discovered from the clue and so I have selected ‘short answer’.
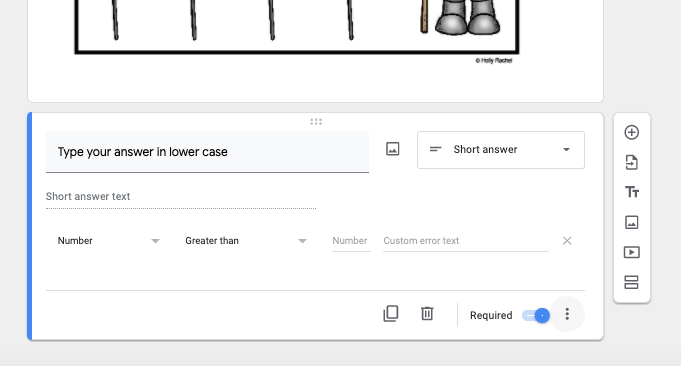
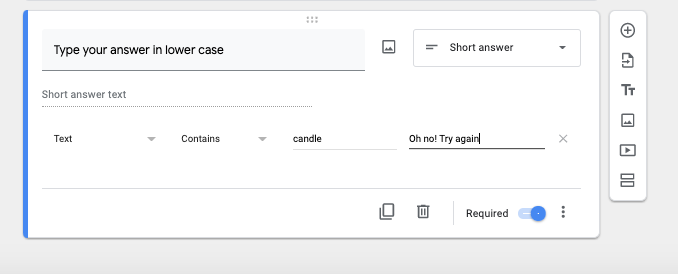
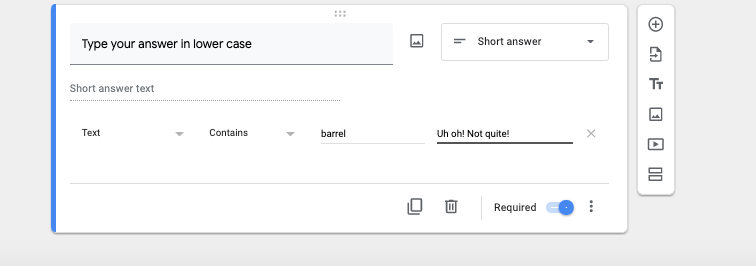
Here you can type your question in the area at the top left. I have my question in the image above, so I have just typed in some further instructions to the student to type their answer in lower case.
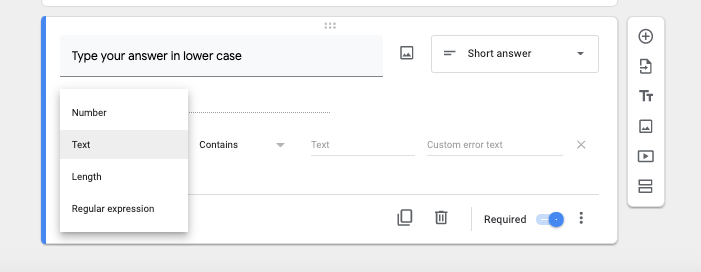
Now you can choose the answer type. This can be a number, text, length or regular expression. I have chosen ‘text’ as the answer is a single word.

You can then set the answer, which the students have to enter correctly to move onto the next section. I want the answer to be the word ‘candle’, so I have selected ‘contains’ and typed ‘candle’ (the answer) in the ‘text’ box. The students’ answer must be in the same case as yours, so this is why I gave the previous instruction to type the answer in lower case. You can also type a message in the ‘Custom error text’ field to give students if they give an incorrect answer.
Make sure you select ‘required’ in the bottom right corner. This means that students have to answer this question before moving to the next section.
If students are successful, they will move on to collecting the first key. I have made this message previously and taken a screenshot. To add image, make a new section as before, then select ‘Add Image’.
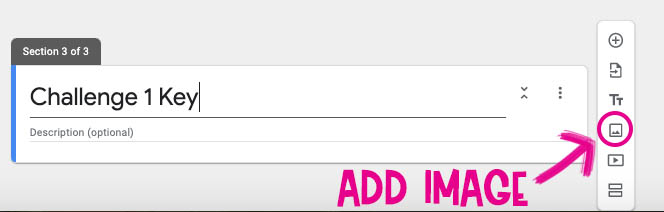
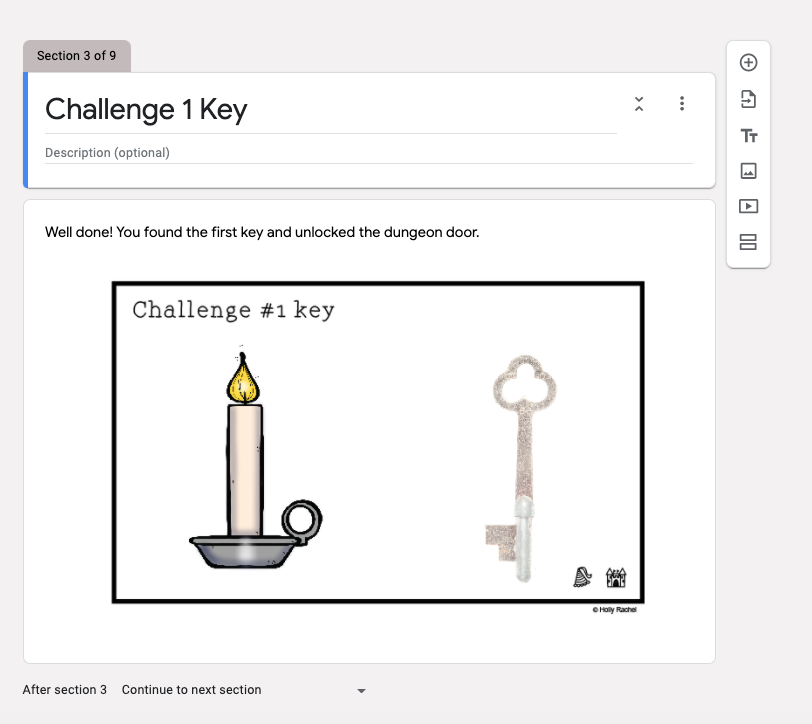
I have added a title ‘Challenge 1 Key’ and you can also add your description. I have then inserted my image of the key and added a ‘well done’ message in the description field above the image.
At the bottom of the section I have selected ‘Continue to next section’ from the drop down menu as I want students to move to the next section without answering a question in this particular section.
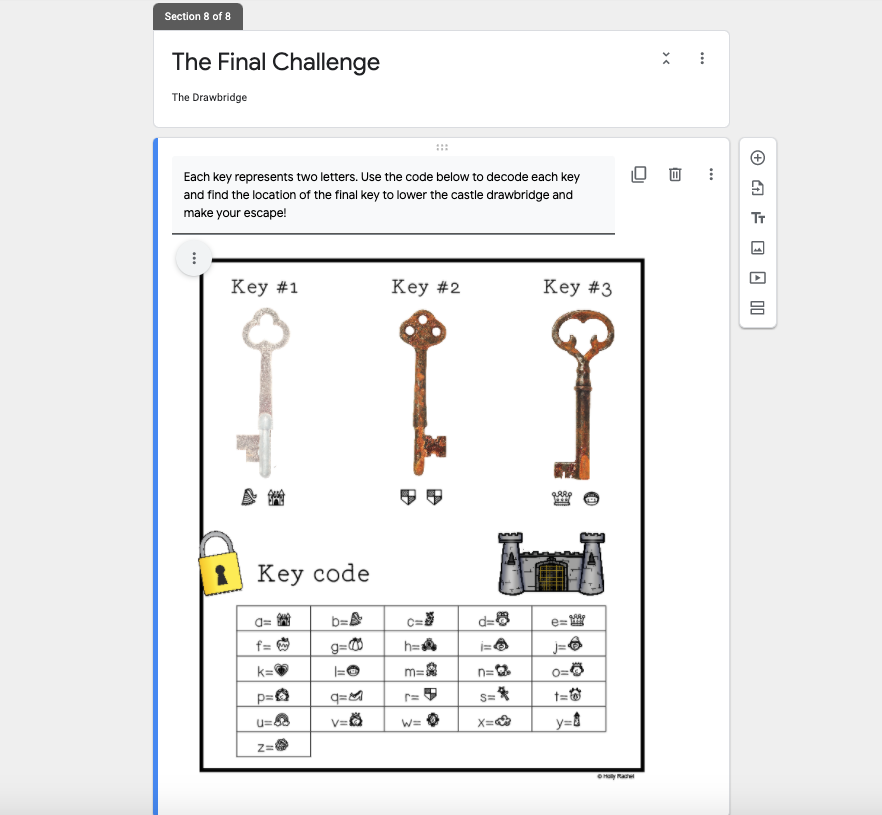
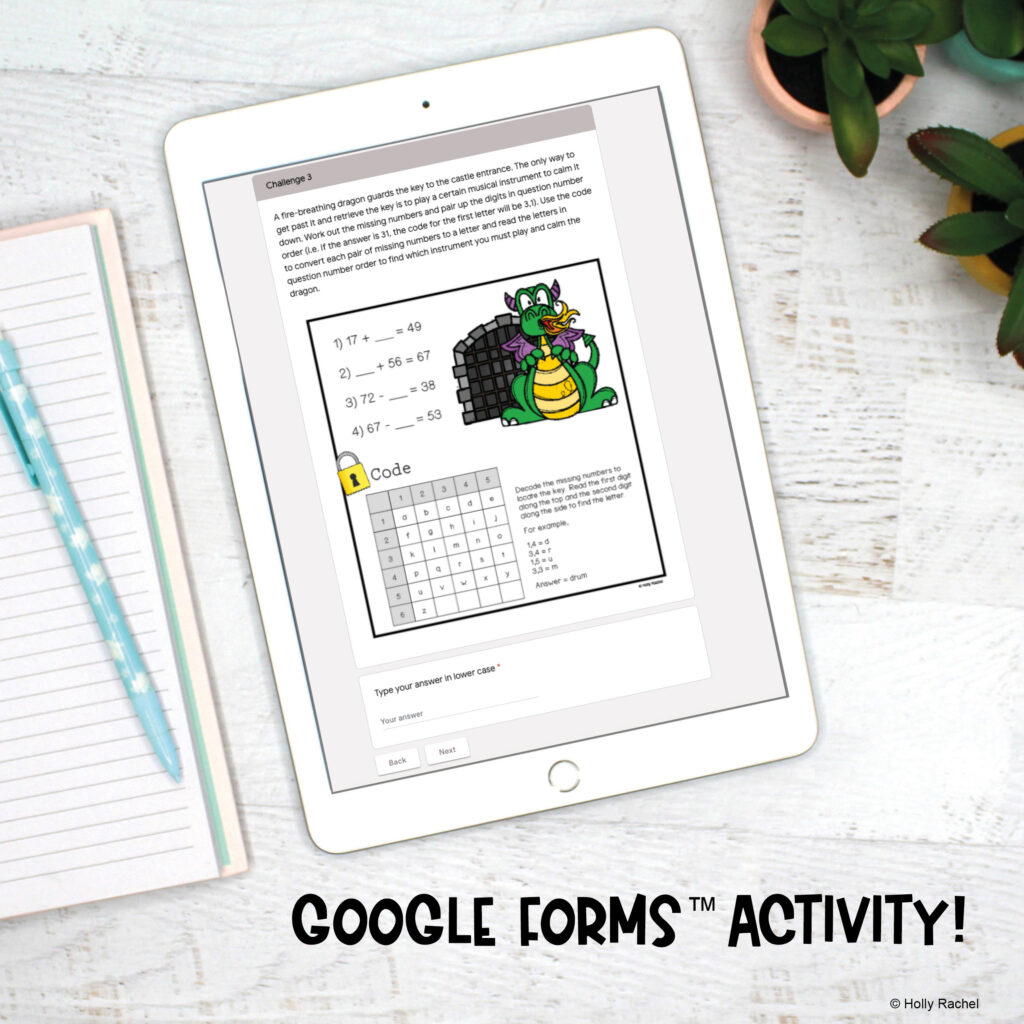
Continue in this way, adding the questions you would like until you reach to the final puzzle. In my escape room, the students will have collected 3 keys, all with small symbols in the bottom right corner. The symbols spell out the location of the final key to lower the drawbridge and escape the castle in code. I set this up in the same way as I create the questions sections.
Insert the image by clicking on the ‘insert image’ section. You can add your title, description and image with the final challenge.
Then add your ‘question’ section. I chose short answer as the answer is a single word. Add the correct answer, error message and made sure ‘required’ was selected.
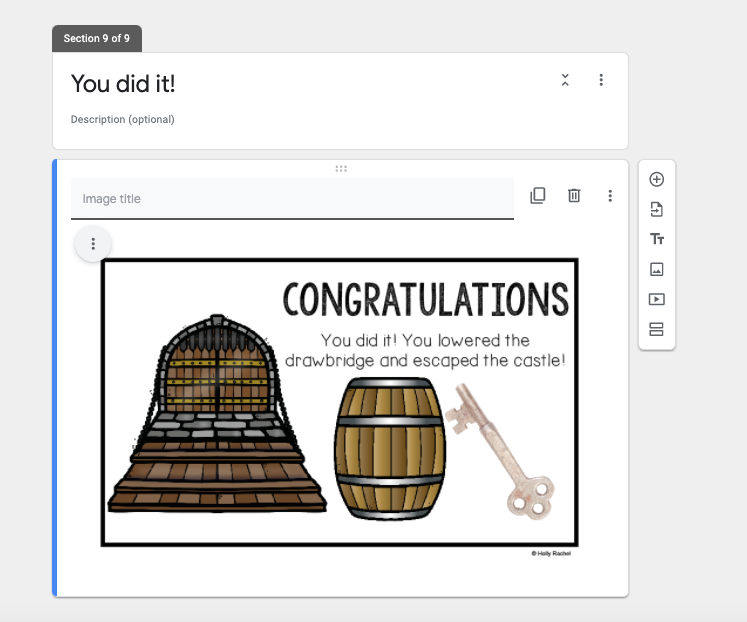
As this is the final challenge, once students complete this section correctly, they move onto the ‘congratulations’ section. Here I have selected ‘add image’ and inserted the screenshot I have taken of the final ‘congratulations’ image.
Why not try it out yourself? You can have lots of fun with creating digital escape rooms for any subject. Plus, the best thing about virtual escape rooms is that they are self-checking!
If you would like the 2-digit addition and subtraction Castle Escape Room I make in this post, you can grab it here when you join my email list.